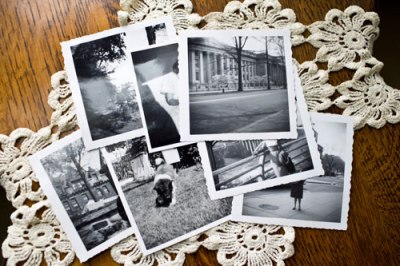
A few years ago, my parents’ basement flooded. Like, a foot of water in the basement, save all the electronics before the water rises, oh my gosh our carpet is ruined, kind of flood. My parents, of course, were upset about the state of their basement, but all of that could be fixed with time (and, of course, money). Unfortunately, the basement is also where all of my mom’s old pictures were stored. Priceless family memories that nothing could bring back, all irreparable. Watching my mom stand over the box of sodden photos, crying, trying to pick out old Polaroids that weren’t completely destroyed, was so, so sad.
An experience like that certainly left me wishing that we had made some sort of effort towards preserving the photos beyond just keeping them in a box in the basement. Maybe we felt like nothing would ever happen, maybe we were all just a tad too lazy to take that first step, who knows. The end result is the same: pictures are gone, mom is crying, this sucks. You don’t want this to be you. Segue into today’s blog post!
Digitally preserving your family’s memories is so simple, inexpensive, and worth every minute and penny. You can use basically any scanner, though we encourage a flatbed since it’ll be the easiest to use, as long as it can connect with your computer. Beyond that, there are some simple steps to making this as quick and painless as possible!
Step 1: Clean house. If you’re anything like my mom, you have saved everything. Every blurry picture of some child’s left eye because they were messing around with the camera, every “why did you take it, I wasn’t ready!” moment. Everything. They’re great for your basement-box, but maybe not worth saving to your computer. Do yourself a favor, and sort through your photos. Pick the best ones, the ones where everyone is looking at the camera, the ones where you can’t believe Grandpa Joe made “that” face, the ones on which you’ll want to look back at and smile. Those are the ones worth digitally preserving. The others, though they’re great in their own respects, you probably don’t need to spend time scanning.
Step 2: Get organized. Now that you’ve picked out only the creme de la creme of your family photos, it’s time to organize them in a way that suits you. Maybe it’s by year (or decade), maybe it’s by holiday, maybe it’s just by who is in the picture. Whatever way makes the most sense for your pictures, go with it. I’d go with the pile method; that is, pile the pictures in their respective categories. It’s fancy.
Step 3: Check your scanner settings. Are you just scanning the pictures in order to preserve them? Are you emailing relatives or posting them to various social media sites? Are you making a huge blown-up picture to put in your living room? Whatever it is, make sure your scanner settings are working in your favor instead of against you. If you’re just in it for preservation, 300 dpi should be just fine. If you’re going to be emailing them or even using #tbt on Twitter (throwback Thursday for you old folks), we’re thinking you could even get away with 200 dpi. If you’re going to make a print that’s bigger than the original, go for at least 600 dpi. If what I just said sailed right over your head, visit our scanner lingo breakdown post for help. Don’t forget that you can change the scan color between gray scale or color!
Step 4: Scan! Well, start off by cleaning the scanning glass to ensure optimal scans. But then, scan! Most of the time you’ll have an option of “previewing” the scan before you actually scan it into your computer. Utilize this to make sure you don’t have to double back to re-do scans, and to make sure you’re not duplicating scans into your computer. You’ll probably want to save them as JPEG files, thought it’s up to you. Your computer will give you an option of where to save the files to, so for each grouping you did when you were organizing your photos, make a new folder with a relevant name (like, “Christmas 2014” or “1995 Pictures”) to save time trying to sort them post-scanning.
(optional) Step 5: Edit. Though this step isn’t necessary, I definitely recommend it. Even a simple, cheap photo editor can do wonders for your pictures. Many times, all you need is an exposure adjuster to change the brightness/shadows of your picture. There are so many inexpensive photo editors to choose from, but here’s a site that reviews some of the best that are under $100.
That’s it! You should be done! Now just let that feeling of peace of mind wash over you. No flood, tornado, freak accident, or fiery comet of death causing Armageddon can destroy your family’s memories and legacy. Maybe the comet. But you’ve got bigger fish to fry if that’s happening, so for now just revel in that feeling of accomplishment.


