Category Archives: Tech Support

How a Microfilm Reader Works

The mysteries of technology are endless. Well, okay, maybe they’re not so much “mysteries” as “things I don’t know about (yet),” but still. I’m around microfilm readers every single day at Imaging Systems, yet they have always been a bit foreign to me. I’ve certainly never actually used one, only ever looked at its parts in the warehouse or rolled one back to one of our technicians so they could work on it. It seemed about time I learn more about the thing I’m constantly blogging and tweeting about. With the magic of Google and a few pertinent questions to the experts, I think I’ve got a pretty good understanding now! Allow me to elaborate.

Microfilm readers are basically glorified overhead projectors. Ya know, those things from elementary school?
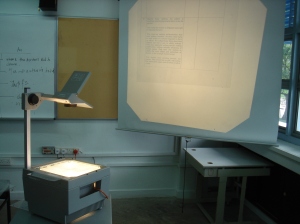
Overhead ProjectorRinging a bell, now? Basically if you made a hybrid between an inexpensive overhead projector and a top-of-the-line movie projector, you’d end up with a microfilm reader. But how, exactly, do they work? I’m going to do my best to explain.

The must-have components of any microfilm reader is a (powerful) light source, mirrors, and a projection screen. And, of course, the microfilm itself.
Like an overhead projector, the film is illuminated as its image is sent through a series of mirrors to then project a larger version of itself onto a white screen.

Overhead projector 2

However, a microfilm reader uses film (or fiche) instead of a plastic laminate. In this, it’s like a movie projector that also uses film. A movie projector works in a very similar way to an overhead projector, in that it uses mirrors and a light source to project the image onto a white screen. A movie projector, though, is constantly flashing through the images on its film reel to give the illusion of movement. A microfilm reader does the same thing, except without automatically going through the microfilm. It allows whoever is using the machine to look at each image at his or her own pace, and then to wind the reel to look at the next image (usually by pressing a button on the machine).
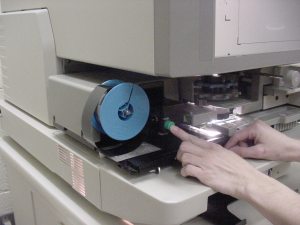
microfilm reader 2The microfilm reel is loaded into the machine, and then pulled along the feeder until you get to the image you want. You can go backward and forward through the microfilm reel, making your research run a little bit smoother. Some readers are equipped with printers that allow you to print the image that you have projected onto your screen, too!

Hopefully my expert sleuthing of the internet has provided you with enough information to be an absolute expert in microfilm readers. Or, ya know, just not sound completely moronic when talking about them. Anywho, happy microfilming!

Know Thy Scanner, Love Thy Scanner

I have no idea how my car’s engine works. Literally, just absolutely no clue. I know gas makes it go. If you think about it, I’m sure there are an endless number of things you use every day that you don’t really understand how they work. We all take these things for granted, which is fine since there are many hard-working people whose jobs it is to fix these things for us if something should go wrong.

But isn’t it nice to be in the know about these things? Not just for your Trivial Pursuit repertoire, though that’s very important, but to know if something goes wrong you’ve got the knowledge to go about fixing it. I know any time I need to have any work done on my car, I call my dad immediately. He knows so much that I don’t, so I want to make sure I’m getting the best deal, and getting what I actually need from my mechanic. When I’m buying a cell phone, though, I go it alone since I’ve got that stuff pretty well figured out. It’s so much easier not having to rely on others to help me with these types of things.

Your scanner is one of those things. The concept of its function in incredibly simple, but the actual execution is pretty complex. As Office Space has shown us, scanners can (and do) stop working, sometimes for seemingly no reason. Equipping yourself with some basic knowledge of how scanners work could end up saving you your time and sanity. So let’s dive in!

The scanner goes through multiple steps between you pressing the scan button and the file showing up on your computer. After your document is placed on the glass plate and you close the cover, that’s when the magic happens. As you probably have noticed, the inside of the cover is most likely white (most are). This makes it so that the background is consistent, making it easier for the scanner to recognize where the document begins and ends. Once you press “scan,” the lamp beneath the glass is used to illuminate your document.

This is where things start to get a little tricky. Scanners use multiple mirrors, a lens, a filter, and a charged coupled device (CCD), which altogether make up the scan head. The scan head is moved slowly across the document by a belt attached to a stepper motor. The scan head is attached to the stabilizer bar to make sure that nothing is moving around when it passes over the document.

When the scan head is moving across the document, the image is reflected through multiple mirrors until finally being reflected through the filter into the  CCD. The CCD has light-sensitive photosites arrayed along it that read the level of brightness into electronic signals. These levels of brightness are then processed into a digital image.

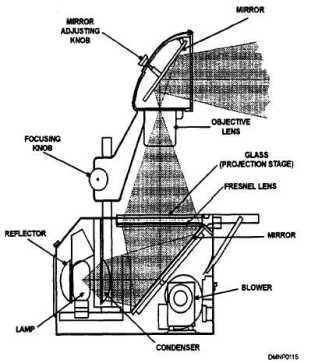
Did that make sense? I’ll try and put it in layman’s terms.  The light is shot at the paper. The reflection goes through a few mirrors. Then the reflection is shot into the neat light-sensitive board. That reads the level of brightness it’s sensing. A black letter will give off a lower level of brightness than a white blank spot. This is then converted into the digital image we see on our screen. Hopefully the picture helps.

how scanners work

But how does it get there, you ask? Great question. The scan is pretty useless unless we can access it on our computers. Scanners have a few options of how they connect to the computer. A parallel connection, a small computer system interface (SCSI) connection, USB, or FireWire. USB connections are probably the most often used because they’re fast, easy, and affordable.

Other than that, the last piece of the puzzle is to have software that knows how to communicate with your scanner. It’s often referred to as the driver. Think of it as a language barrier. Most scanners speak the same language: TWAIN. Your scanner converted your document into TWAIN. With the help of your software (driver), you’ll be able to turn that TWAIN into readable English on your computer. Though obviously it still works if you’re scanning something in Spanish. I really hope you got that joke. If not, go re-read the entire post and try again.

That’s it! You should feel smarter. I do. Now when something goes wrong with your scanner, you will look like the smartest guy (or girl) in the office. Spew off a few key words and everyone will think you are a genius. You’re welcome. If this doesn’t help you actually fix your scanner in the future, at least you’ll know what the repair guy is talking about.

Spectrum XF Windows 7 Installation Package

If you have’t already read our post on it, a little over a year ago one of our technicians, Sauron (yes, that’s pronounced exactly how you think it is, Lord of the Rings fans), figured out a way to make the Bell & Howell 8000 Spectrum XF Scanner Series compatible with Windows 7.  Hooray, Sauron!

That was absolutely fantastic then, but even more fantastic now. Why? Because in April of 2014 (just a couple short months away), Windows will no longer support Windows XP. If you’re currently running XP and use a Spectrum XF scanner, updating to Windows 7 could cause a problem or two (or ten).

Luckily, we at Imaging System (and of course, Sauron), are here to help. We’re offering a Spectrum XF Windows 7 Installation package to help you have a smooth transition into Windows 7. Here are the details:

What am I buying? You are paying for the hour of service including the guided installation of VRS 4.5 on Windows 7 (32 bit), which will enable you to use your Spectrum XF scanner with a computer running Windows 7.

How much does it cost? The cost is $400.

What is included? A PDF of complete instructions to ensure that this process can be repeated, a VRS 4.5 installation disk with file and folder names that match the installation instructions, and one hour of guided service.

How soon can I start? After you purchase the software, we’ll ship you the installation disk and email you the PDF.  Once you receive them, you should call (608) 276-5559 and ask for Sauron or send an email to sauron@scannerparts.biz to make an appointment.

What do I need? Besides the PDF instructions and the installation disk that we send you, you will need:

  • Windows 7 (32 bit) with no previous version of VRS installed
  • Fully functioning Bell and Howell Spectrum XF Scanner
  • Functioning Kofax Adrenaline 650i PCI card
  • Fully operational SCSI cable
  • Administrative rights to the target computer.

How do I buy this? Great question. You can call or email Sauron! If you have any questions, he’s your go-to guy too! If you forgot already, the phone number is (608) 276-5559 (ask for Sauron) or his email is sauron@scannerparts.biz

Troubleshooting Microfilm Machines

office-space-fax-machineMicrofilm readers and printers can be finicky. Sometimes they just need to be cleaned, other times you need a new lens or roller, and worst of all, occasionally you need to buy a new machine altogether. Fortunately, many times a reader/printer’s problem has a simple, cost-free solution. So, before you go Office Space on your machine, see if these easy trouble-shooting tips can help you.

These tips come from a Minolta RP 605Z machine, but many of the solutions can be used for most microform readers and printers.

Problem: My machine won’t turn on.                                                                                       Solution: Make sure the side door that gives you access to the printer/toner is closed all the way.

Problem: Paper jam.                                                                                                               Solution: When you loaded the paper in the printer, did you put the metal spring clip above the newly loaded paper? If not, go try that. If that didn’t work, are you sure you’re using the right size of paper? Check with your machine’s manual to ensure you have the right size for your machine.

Problem: It won’t load the microfilm or microfiche.                                                         Solution: Your machine needs to be turned on in order to load the microfilm. It’s on? Okay, well are you sure that your machine is compatible with your microform? Some only read microfilm, some only read microfiche, and some read both. Consult your handy manual…or the internet.

Problem: I’m pressing the load button, but it won’t work.                                       Solution: Try loading the film manually. Here’s a video of how to load the film. Instead of pushing the load button in the film, try and work the film through yourself.

Problem: I can’t focus or zoom.                                                                                       Solution: Try taking out the lens then putting it back in to make sure it’s installed correctly.

Problem: The screen’s brightness is uneven or too dark.                                               Solution: Check the lens to make sure it is clean and properly installed. Not sure how to clean your lens? Here’s a how-to. 

Hopefully your problem was one of the “simple solution” variety. If not, give us a call at (608) 276-5559 and we’ll see if we can help you get your machine running like new!

Caring for a Microfilm Reader

As we’ve already talked about how to clean your scanner, we figured we’d also give you some pointers on how to care for your microfilm or microfiche reader. Just like with scanners, and probably even more so, microfilm readers can be incredibly expensive to fix. Many are older, and finding the right parts you need can be a hassle. Luckily Imaging Systems has a huge warehouse full of used and new microfilm parts to help you out. I digress. Doing routine maintenance and upkeep of your microfilm reader can save you serious cash in the long run.

You will need: 

  • Soft Cloth
  • Glass Cleaner
  • Small Screwdriver
  • Mineral Oil
  • New Light Bulb (optional)

Again, we know, it can be easy to look at a machine and feel overwhelmed. For reference, you should be looking at a machine resembling this. You are? Okay good.Microfilm-ReaderDon’t be scared. We’re in this together. Deep breaths, here we go!

  1. Position yourself in front of the reader.
  2. Lift the viewing glasses–the two plates of glass that are below the magnifying glass. Just move the lever attached to them and then you should be able to easily open ’em up.
  3. Using your soft cloth and glass cleaner, gently clean the plates. Let them air-dry before you close them back into place.
  4. Remove the reels that hold the microform (this is where your screwdriver comes in). Just remove the screws on either side of the spindle, which will expose the gearing. Put a small drop of the mineral oil on the gears, reattach the spindle, and slowly turn it. This helps to avoid rust. Do the same thing on the other reel. Close them back up and put the screws back in.
  5. Find the small door with the handle. This is where the light bulb is. If you need a new one, replace it. If not, use the soft cloth and some more of the glass cleaner to gently clean the bulb. Again, let it air dry. Close the door.

You’re done! You can exhale now. If you’re someone who didn’t know to be doing this routine with your microfilm reader, check our online store or give us a call at 608-276-5559 and we’ll see if one of our technicians can help you get your machine working like new again!

How to Clean your Scanner

Scanners can be so expensive; depressingly, infuriatingly expensive. Just as you get regular oil changes to keep your car running like new, routine cleaning of your scanner can help it continue to perform at high levels as well as save your wallet from unnecessary scanner-related expenses.

That being said, it can be incredibly intimidating to mess around with technology that you don’t have any experience with. I have absolutely zero car knowledge, and thus even when I’m in need of the smallest, easiest repair, I’m off to the mechanic. Similarly, many people would prefer to just pay a fee for a new part here or there instead of risking messing up the entire scanner.

Luckily, I’m here to empower you! Scanners are nothing to be afraid of, and simple upkeep and cleaning is easy as pie. Here’s a step-by-step on how to quickly and safely clean your scanner:

  1. Unplug the power cord. No-brainer, obviously, but it’s a step easy to forget. Not that you’re going to do anything to get you electrocuted (hopefully), but better safe than sorry.
  2. Open the lid so you can see the glass. See? This is easy.
  3. Use a soft towel or wipe (something that won’t leave debris when cleaning the glass) and some rubbing alcohol to clean the glass surface, making sure any dust or grime is loosened and set free. Our certified technicians almost exclusively use rubbing alcohol when cleaning scanners here at Imaging Systems. It works. But, be sure not to have the towel dripping with the rubbing alcohol–just put enough on there to make it damp but not sopping. You don’t want the liquid to seep into the inside of the scanner (see step 1).
  4. Do the same on the inside of the lid (the part that touches the glass when it’s closed).
  5. Does your scanner have a transparency lamp? It could llampook something like this—————————————–>                 If it does, just rub that down with your towel and rubbing alcohol too.  This will help ensure your scans don’t have streaks. No transparency lamp? No problem, moving right along.
  6. Last but not least, use a dry (and again, debris-free) towel to wipe up any moisture remaining on the scanner. Close the lid, plug ‘er back in, and you’re set!

See how easy that was? Routine cleanings of your scanner can save you so much time, money, and stress in the future, and when it’s so simple you’d be crazy to not do it.

Have a microfilm scanner that you’re not sure how to clean? Stay tuned for another blog post on how to care for a microfilm or microfiche reader or scanner. Happy cleaning!

OCR Made Easy

ocr-scanningFor those of you who don’t know OCR stands for Optical Character Recognition. In layman’s terms, OCR stands for the ability to scan a document and then be able to directly edit and search that document. OCR software recognizes characters (letters) of scanned documents and creates a workable document consisting of those characters. It can save you time, energy, and money by doing any re-typing of documents for you. Need to scan a book and then be able to search for key words within it? OCR is your friend. Of course, no OCR software is flawless quite yet, but a good one will only require minor editing of the document in question.

There are many different OCR software options available to you, ranging in
price from $50-$500. True, some do work better than others and may be worth your while to invest in. Some well-reviewed OCR software options can be found here  and here!

However, if you’re just beginning with OCR software, or if it would only be utilized for a “one-time” project for your home or business, then you’re in luck, because you probably already have OCR software on your computer!

If you have Microsoft Office installed on your computer, then you most likely already have OCR software installed and ready to use.  The steps for using it are super simple:

  1. Click on Start, All Programs, and then Microsoft Office. From there, you should find “Document Imaging” either in the list of applications, or under “Microsoft Office Tools.” Click!
  2. Put the document you would like to scan in the scanner and make sure your scanner is turned on. Now, on your computer, under the File tab, choose “Scan New Document.”
  3. Follow the prompts! Do you want it black and while or color? Gray scale? Why not! Choose the presets that are best for your project. The software’s default is to pull the paper from the automated document feeder. If that’s not what you want, click on the “Scanner” button and uncheck the “Use automatic document feeder” button.
  4. Once you’re ready to scan, click the “Scan” button to begin!
  5. Once the document is finished scanning, click on Tools and select “Send Text to Word.” From there, it should open up a Word document for you with the text of your scanned document!

Make sure to go through for editing purposes, as it most likely won’t be perfect. But still, for free and basically no hassle, it’s a great tool to use.

Windows 7 Update for Bell & Howell Spectrum XF Scanners

Our technician Sauron is receiving quite a bit of approbation around the office today — he discovered a way to make the Bell & Howell 8000 Spectrum XF Scanner Series compatible with Windows 7, something that hasn’t be done until now.

Beginning in 2014 Windows will no longer support Windows XP, which until yesterday was the only operating system that Spectrum XF scanners would support.

Thanks to Sauron, Imaging Systems has become the first company to find a solution! Companies no longer have to worry about their expensive scanners becoming altogether fallow. We will be offering customers with software updates along with tech support in order to make the switch to Windows 7 as easy and painless as possible before 2014.

If you an Spectrum XF scanner in need of the Windows 7 update,  call us at 1-800-830-9934 for further assistance.

UPDATE : We are offering an installation package to assist you in the transition from XP to Windows 7. For details, visit this link.

5 Questions to Ask if Your Scanner or Microfilm Machine is Broken

Are there any IT Crowd fans out there? Anyone who works with computers for a living will definitely appreciate the show’s ultra-nerdy tech humor! The two main characters work as IT employees in the basement of a corporate business, and as a running joke throughout the series, the first thing they always ask customers is, “Have you tried turning it off and on again?”

I immediately thought of the show  while talking with one of our technicians here at Imaging Systems this afternoon. I asked him what would be the first thing somebody should do if their computer or office machine isn’t working properly. He replied, very assuredly, “They should try turning it off and on again.” Luckily he’s also a fan of the show, so when I started laughing there wasn’t any awkward what’s-wrong-with-you silence on his part.

But seriously, how often has simply turning something on and off again fixed a technical issue? I’ll raise my hand without shame — I was an English major in college, so without a doubt I belong to the percentage of customers that IT people make witty jokes about over beers at the local pub. You know who you are!  For those of you having problems with your at home or office scanners/microfilm machines,  who are also like me and electronics continue to baffle them, fear no more! The Imaging System technicians have combined their knowledgeable brains and created some handy dandy questions to ask yourselves before kicking the machine square in the caboose:

    Scanner Machine:

  1. Have you unplugged the scanner yet and plugged it back in? Try this: unplug the machine, count to 15, and then plug it back in.
  2. Does the scanner offer an error message? If so, try searching for the error message online — more often than not there will be a public forum with answers on how to fix that particular error.
  3.  Restart the computer your scanner is hooked up to. Yes, turning it off and on again (had to throw that in there).
  4. Are the scanned images cloudy or do you see lines running up and down the paper? This may mean the scanner glass needs to be cleaned. Our technicians recommend using alcohol on cotton balls to clean the glass.
  5. Does the printer that your scanner uses spit out paper or constantly jam? Either of these signs might indicate that the printer rollers need to be taken out and cleaned thoroughly.

     Microfilm Machine:

  1.  Same as above, have you unplugged the machine and plugged it back in? Try this: unplug the machine, count to 15, and then plug it back in.
  2. Are the microfilm bulb(s) plugged/twisted in all the way? Sometimes they can become loose!
  3. Is the microfilm lens seated properly? Similar to the lamps, lenses can easily become loose or tilted.
  4. Do the images look cloudy? Do you see lines or fuzzy dots? These may be indications that the microfilm mirrors need to be cleaned. Make sure to also check that the lens is in focus.
  5. Do the images look too dark? You may need to replace the bulbs.

Hope these questions help to bring your machine back to working shape! For all other questions please feel free to contact our tech support team: 1-800-830-9934